|
The Caped Custodian.
|
After a little bit of a getaway, I'm back and picking up the brushes again. So while not a whole lot of progress has been done since last time, there are enough little pieces to note down what has been done.
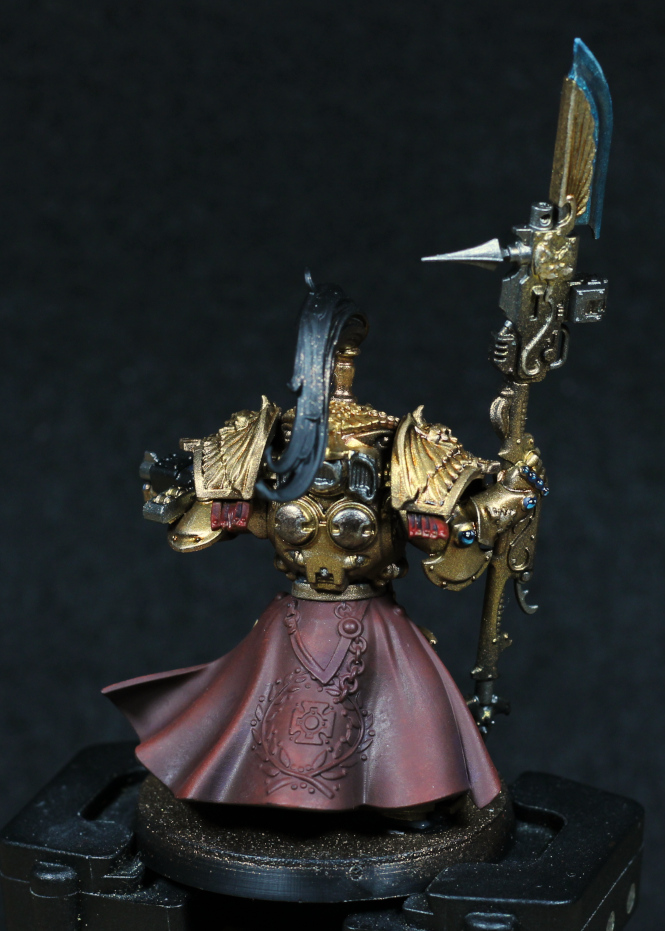
To start with, the armour has been highlighted on this model. It doesn't really look that way in the photo, and indeed it's subtle, but sometimes subtle stands out more. I toyed with a few things but ended up with:
- Canoptek Alloy / Liberator Gold (1:1) mix for an initial highlight, mostly along "feathers" of the various eagle designs, and edges. Liberator Gold alone has the wrong hue and doesn't match the gold armour, so here it's mostly used to saturate the Canoptek Alloy slightly.
- Canoptek Alloy for edge highlights, or anything that should stand out in particular.
For what I take to be either shield generators, or some kind of power reactor on the back:
- Warplock Bronze base coat.
- Castellax Bronze to highlight, with a fair amount of mixing with the previous colour to get the transitions just right.
- Canoptek Alloy for edges.
Obviously I'm enjoying Canoptek Alloy quite a bit here. It's a remarkably versatile paint and can be used for bright edges where a silver simply doesn't fit.
Gemstones I have to guess at. I wrote it down at the time, but have since lost the piece of paper. So this is a guess but should be close:
- Night Lords Blue across the gemstone.
- Sotek Green across about half the gemstone.
- Ahriman Blue as a sort of edge highlight.
- Abaddon Black, or Nuln Oil to darken the opposite side. This step isn't always necessary, especially for smaller gemstones.
- Corax White for a reflection dot.
- 'Ardcoat gloss varnish at the end.
The blues tending more towards aqua are a bit of a running theme for these models: I used Talassar Blue, Aethermatic Blue, a little Baharroth Blue, and some Guilliman Blue (the old glaze paint) for the power field effect on the weapon. I tend to give it more colour towards edges and points, and use stripe motions or drybrushing for a weapon in motion. The model shown here is not swinging his weapon, so it's a smoother appearance.
And the cape. I played around on another model to try get a feel for how to paint soft material, and initially tried stippling, dabbing with a drybrush, and glazing, but in the end most of that was simply wasted. Cloth does not highlight with smooth transitions like hard surfaces, so drybrushing works really well. It also doesn't desaturate from reflectivity, so the choice of highlight colour really matters too. In the end I'm going with:
- Dryad Bark / Mephiston Red (1:1) through the airbrush, all over the cape. Most of this is going to show through, so two coats to give an even finish might be needed.
- Word Bearer's Red, drybrushed very gradually and slowly built up in desired areas. Really take some time with this step: rushing will ruin it. Dabbing motions can also be used if the paint isn't quite so dry.
- Mix a very slight amount of Ulthuan Grey with Word Bearer's Red (and not much at all is needed - if in doubt, use less Grey) and drubrush this onto more prominent folds.
- Agrax Earthshade stippled, dabbed, and glazed into deeper recesses.
- Druchii Violet stippled, dabbed, and glazed across mid-tone areas to give some variation.
The capes will be matt varnished before being glued into place. In the photo above it's simply staying there, but isn't yet glued. The varnish step will help to differentiate the texture from metallic gloss that much more.
I'm not sure yet quite how to paint the top-knot. Red as a primary colour seems like it might be suitable, but too bright or saturated and it will take attention away from the rest of the model. There are still small details like the vents on the back that need finishing, the weapons, and various other items of interest. The base I will do as white marble.
In other words, still a lot to go on these models - at least two more blog posts, perhaps even three, but there is progress.
-- silly painter.