Friday, December 31, 2021

Avatar of Khaine - Part II


That was a very spicy curry.

The Avatar of Khaine's molten body effect is now more or less done, or at least enough that I can move on with other areas. I had initially planned on keeping the "shins" white, but ultimately decided that more black was required and so continued to keep the molten look there as well. There's still a white loincloth to be done, the head will be darkened, the hair will be smoke, and the base I've yet to decide on.

I tried Dark Reaper on some blackened areas, but ultimately it didn't do much for the effect. I wanted the black areas dark, and the Black Templar Contrast paint works well enough that I will very likely just leave it as is now. By keeping those areas black, it helps make the "lava" glow appear much brighter in comparison.

Right now the lava effect is a little too much, and draws the eye to the crotch. Not a good look really. I'm hoping that will change once more of the face is done, but the next steps are very likely going to be painting in all of the metal clasps holding spirit stones. I'm leaning towards a bronze appearance there, rather than gold, wanting a slightly darker tone that's more harmonious with the model rather than trying to stand out too much.

The white of the armour will be more of a beige, or cream, but I'm not yet certain how to paint that. I could lean towards bone colours, but I want something a little brighter than the usual paints used there. There's also the texture of the areas to consider - there's a very good chance that too many layers of paint will simply do away with it, and I would like to use the airbrush on some of those places, but that's now tricky with the molten effect now done. I could varnish and mask off the relevant areas, which is something I'm considering, but need more time to think on the matter.

-- silly painter.


Thunderhawk Gunship - Part II


Na nana na na-na, Thunder(hawk).

While working on the multiple marines I've also been keeping the Thunderhawk nearby for some airbrushing work. This might have at first seemed something straight forward to get done, but actually it subtly trickier. I wanted to use the same basic colours for everything else Blood Angels, but the shading wouldn't quite match due to the scale difference. I've also been leaning towards highlighting panel surfaces rather than edges, so again needed to approach the airbrushing differently there.

The end result is giving edges of panels a darker shade to help outline the general shape of the vehicle, and I'll go back in later to apply either a directed shade, or oil wash and pin shading. I've not yet decided which I'll go with, but I can make the oil wash thinner and much darker, which might suit the scale better. No reason I can't do bother either.

I think so far the airbrushing has turned out well. It will serve as a good base to work from, helping give depth to the model while also presenting an obvious Blood Angels colour scheme. In a stroke of good fortune (for me), the Forgeworld resin 40k Thunderhawk is painted up for the 9th Legion, and so I'm going to essentially copy that colour scheme. On the one hand it's always nice to come up with your own twist, but on the other hand there's enough of a challenge in painting a scaled down version and I don't want to be spending weeks or months figuring out the colours and making no progress.

Weathering will be done on this model. I don't ordinarily do such things, but a Thunderhawk would benefit from a little bit to further sell the impression of a machine of war. Most of the weathering is very likely going to be simple streaks of black on leading edges, which can be drybrushed on easily enough.

-- silly painter.


Sunday, December 26, 2021

Retrospective - 2021

 Going to take a moment out of the normal posts and write a bit of a retrospective about just what I managed to do painting-wise for 2021.

I started the year with a sort-of goal of one miniature per week. I didn't reach that (at the time of writing). Am I sad about this? Not at all. I've had far less painting time this year than last, I still managed a good number done (for me), and I also painted quite a variety. From Sons of Horus, to Allarus Custodians, various planes for Aeronautica Imperialis, a Lamenter, the Sanguinor, Assault Intercessors, and of course finishing Horus.

All of these models offered different colours to work with, different textures to explore, and allowed more practice with the airbrush. Then there's Project 20 Marines, which is still ongoing. While that project was originally just intended to get numbers done, it's become an exploration of batch painting, efficiency in painting, and how well my formula of painting Blood Angels holds up. Fairly well, fortunately, which makes them much easier to progress with - I'm not constantly thinking of how to paint something, instead just getting something done. On those areas where I need to consider it a bit more, I can just keep going with something else while mulling over the options. After all the fun of the other models during the year, it's actually relaxing now to just painting something familiar for a little while. Maybe I can always have about 10 in the background on the go in future - painting I can get done without constantly considering.

And this leads into perhaps the most important thing at the end of the year: am I still as motivated to paint now, as when I was at the start of the year? Yes. Absolutely. I might have been less so if I'd forced myself to get models done just for some arbitrary "one model per week" idea - that helped keep me going as a great-if-I-could goal, but it should never come at the cost of actually enjoying the hobby.

It has now come to a point of next year. I would like to try for one model a week again, if only to help clear the backlog. I would however also like to explore different styles of painting, different approaches to textures, and maybe pushing myself a little on things I've not done much of before, e.g object source lighting, more NMM, that sort of thing. There's also the recent grimdark style from Trovarion that would look great on Death Guard, or some other models I have in mind. Just to mix it up a little.

Some discipline in only buying one new model for every two painted has been a good choice. I've curbed my hoarding, and started to really think about whether I really want those certain models or not. The main benefit behind all of this is again related to motivation: seeing piles of miniatures in boxes is actually a little disheartening, where as seeing a shelf of painted models just wants me to get more done.

There are some side projects that I've started and made some progress on, but haven't mentioned on this blog at all. There are reasons for this, but they're very slow moving because I've been wanting to do other things instead. They'll appear here eventually.

And the Thunderhawk isn't paused either. Actually that's something I'm thinking about the next steps for, but with a bit of luck won't be too far out.

Highlight of the year has to be getting Horus finished, and not just finished but actually looking as well as I wanted him to turn out. Very pleased with that, made the long time spent on him well worth it.

-- silly painter.


Monday, December 20, 2021

Project 20 Marines - Part V


Lightning fast knee to the xenos.

Problem with painting twenty marines at once is that there isn't too much to write about for a weekly based update. I have managed to experiment more with the oil paints however, and have now done seven in this manner, with the rest catching up over the coming days.

The photo shown above is one of the earlier test models. I've actually already applied a matt varnish to this one just for photography purposes, but I will very likely get more painted before that stage on the rest. Painting over gloss varnish is trickier on larger surfaces, but once that first coat is applied (and dry) then the next layers are fine. The recess shading / panel lining on this particular test model is also thinner than what I'm going for with the others, because it doesn't give quite enough depth that I'm going for here. Except on the backpack, but that was done without oils.

The verdict so far is that yes, oil washes are much quicker, but aren't as strong. More mineral spirits allows the mix to flow much easier, but naturally thins out the pigment. I could either do multiple coats, or thin it less; I'm trying for the latter. I'm also using a magenta oil, where Crimson Carroburg is darker, so it might be worth investing in a black oil paint to mix in. This would definitely overcome some of the issues I'm having, so I'll very likely give it a try as soon as I can.

I will admit that using the acrylic washes I so far prefer overall for quality, possibly just because I'm used to them, but also they don't come with the hazardous chemical requirements. The catch is that they're much slower for pin shading, and mistakes are more difficult to fix.

In the end, the speed of application for these models is winning out. It's just that much faster right now, and I'm really trying to teach myself ways of painting larger numbers of models. Prior techniques can remain the domain of special characters or other stand-out models that will have that extra bit of attention, but for getting through twenty "normal" marines at a high quality, the oils is good enough. I do want a high level of finish, but I'm also very aware of just how big my backlog is. I'm hoping in the coming year I can have a constant stream of squads in the background while exploring new techniques and styles on some more singular models.

Finally, the idea of dots of PVA glue is really helpful. Even after all the priming, painting, and varnishing, the masked areas come off nicely and help glue sub-assemblies in place.

-- silly painter.


Sunday, December 12, 2021

Project 20 Marines - Part IV


Showing Raven Guard how it's done.

With the backpacks ready to go, I've been busy preparing the main body of each marine for the final airbrush highlight. This is when I realised a few things that could be done better, making this whole experiment not just about painting a lot of models in one go, but figuring out the best approaches to doing so. This takes extra time, but the experience gained is well worth it.

In particular, while busy edge highlighting with Wild Rider Red, it occurred to me that some of the edges would not be airbrushed over with Evil Sunz Scarlet later on. I was so busy just edge highlighting that I'd forgotten to really picture the end result. Such a small detail, but it will be important later: some edge highlights should be done with Evil Sunz Scarlet directly, or Mephiston Red. Having all three paints on the palette makes this take no less time, it's just a matter of picking the right one for each edge. Knowing that will take some more practice.

The other conundrum that's been occupying my thoughts is how to recess shade later. That takes a long time for me to do, and I wasn't particularly looking forward to it - perhaps had been delaying these models longer for that reason. So I decided to do something about and turn to oil washes. The little Tau drone is something used to experiment with that, and it worked so well that I will almost certainly be doing the same across all twenty marines (after confirming on a single test model of course).

Oil washes come with their own issues, and require more chemicals to work with, so this wasn't something I did on a whim. I prefer to have a small painting area that I can just use whenever I feel like it, and the oil washes do take a little bit of preparation. The thinner also smells; there are odourless mineral spirits, but these just mask the toxic chemical in the air, and I'd rather know if I'm not ventilating the room properly.

The basic idea with an oil wash being used for pin washing is:

  • Apply a gloss varnish. This helps break surface tension.
  • Mix an oil paint with some mineral spirits (or white spirits) to a wash consistency.
  • Dab the wash into recesses, and the solution will naturally flow into surrounding recessed areas.
  • Leave to dry for a few hours.
  • Apply a matt varnish afterwards to remove the gloss.

The last step might be suitable for later where I normally apply that anyway, but it depends how well acrylic paints will apply on the gloss surface. I'll just have to see. Either way, before the last varnish step is the ideal time to apply transfers. It's also worth bearing in mind that pin washing doesn't have to be done immediately at this stage, it can well wait until much more of the model has been done.

The prototype for this approach is the Tau drone. It has lots of panels to outline, so served as a good practice for how it might work on a marine. I picked up Magenta (from Winsor & Newton) which seems to match Crimson Carroburg rather well, but it was thinned a little too much here. I also put a dot on one area and just used water with the brush to smooth it out. Using a very small dab of the spirits would have worked better and allowed a much smoother transition, but I can see the potential.

Next steps are to finish edge highlights, start on the final airbrush highlight, and then try a test model with the oil paint. It's extremely promising, and I'm hopeful it will take just one day to recess shade all the marines instead of taking a full week.

-- silly painter.


Tuesday, December 7, 2021

Avatar of Khaine - Part I


Yellow Man.

This series might take a little while to get posted, as I'm intending to write out everything in steps, then post everything at once or in short succession.

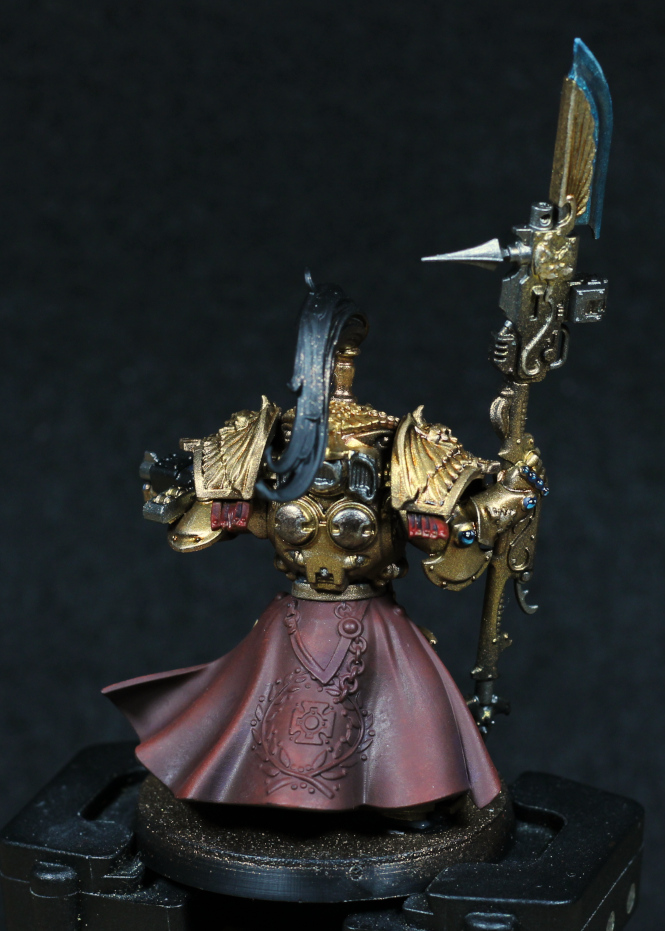
This is the Forgeworld Avatar of Khaine, spear version. As is typical from Forgeworld, the detail is incredible, and will help in painting this monster. There are very few defects in the model as well, only minor places that were easily fixed with either a bit of putty, or closed up with a dot of superglue. I was concerned with the weight and how few contacts points on the base there are, so that has been pinned and glued. I intend to strengthen the pins with some putty underneath as well, but for not it's a solid connection to the base.

This Avatar will be Ulthwe, with a few tweaks to match that. Shin and forearm armour (decorative only when it comes to an Avatar) I'll go for a bone colour, and generally black elsewhere. This lends itself naturally to the typical magma appearance most commonly painted, and I'm not inclined to make something different right now.

To start with, the model was of course fully cleaned and then primed black. A necessary step with resin, as other layers will easily come off if this isn't done. I then had the clever idea of using an airbrush to spray white into all the magma cracks - only it wasn't that clever. The paint didn't really want to go into the cracks at all, so I ended up just giving the whole model a light "dusting" of White Scar through the airbrush. I'd thinned the paint well beforehand, making it more of a white ink than anything else.

Fortunately the initial white layer helped more than hindered in the end. It picks out details clearly, and serves as a good base for working with Contrast paints. It's also much finer than using a spray can, so I'm going to keep this in mind in future.

Back to a paintbrush, I thinned White Scar with a good amount of flow improver (basically Lahmian Medium) to turn it into a wash, and then directly fed it into all the cracks and left it to dry. This process was repeated about four times until a solid white built up. It's good to allow this to spill over the cracks as well, so don't worry about that.

Next step is to cover all these areas with Lamenters Yellow, the good old glaze paint. I liked the yellow this gives - a very bright, but pale, yellow that fits for the fiery core of the Avatar.

Next is Iyanden Yellow (Contrast). This is basically thinly applied over most of the "skin" but not in the deep of the cracks. Sides, and upper layers, and anywhere that should be ever so slightly cooler. Despite the name, the paint actually appears ever so slightly orange in comparison to the previous step.

Following on, Blood Angels Red (Contrast). This is quite a strong paint, so thin it with contrast medium about 1:1, or even 1:2. This mix is then glazed onto the skin, slightly back from the cracks, and blended where possible into the edges. Use as many coats as feels right.

Finally, Black Templar (Contrast), thinned with the medium in about 1:1 and applied further back from the cracks and given multiple coats to really darken the areas between the cracks.

I've not yet done anything further, but I'm contemplating a slight drybrush of something onto the blackened areas just to give them a little bit more depth. Picking the right colour will be key, so I'll wait until I've gone around the whole model with the contrast paints first, and then see how it looks.

The base has very few adornments. I'd considered buying a specialty base, but will probably just go for some freehand wraithbone styling and then build up scorch marks around it. Plenty of time to think about that step.

-- silly painter.


Sunday, November 21, 2021

Thunderhawk Gunship - Part I


More speed required; quick, paint it red!

The Aeronautica Imperialis scale Adeptus Astartes Thunderhawk Gunship (to give the entire title) has been recently released, and naturally I had to pick one up. It will of course be painted in Blood Angels colours, and will very likely be considered the centrepiece of any Aeronautica squadrons I end up collecting. This is not foreseen to be a quick project.

The model itself is wonderfully detailed. Casting processes and CAD designs really have improved over the last few years, and Games Workshop was correct to wait for now to be releasing such things.

Assembly was fairly good, not much cleanup required, and everything fits together well. It's difficult to put pieces in the wrong spot or the wrong way around, and I was impressed with that aspect. The front foils, and the tail, have to be glued in place carefully or they'll be leaning off to one side too much, but that's really the only assembly issue I had.

Oddly enough, the kit doesn't come with wing attachable bombs, even though that's an option on the included rules sheet. I still have spares of those from the Thunderbolts, but it's odd to give an option that the kit can't provide. The missiles are all there, and I suspect will be what most people want anyway, but given that some tournament rules are "the model must represent what it has in the game" then this might annoy some people.

The landing gear can be either up or down. I have it in the down position because I like it for display that way, but I haven't glued it in place. It doesn't look suitable for magnetising to swap around either, not without a lot of hassle and far more experience in such matters than I currently have, and that's also a shame. I'll just be using blu-tac for now; I can always change my mind later.

So with this model, and Project 20 Marines, and a couple of other things in the works, I'm really getting bogged down in any feeling of progress. Fortunately a lot of it is Blood Angels, so I am familiar with the colours, I will be using the Forgeworld paint scheme for reference, and I should be able to swap around projects to keep interest going. Expect things to be a little chaotic for the rest of the year.

-- silly painter.


Sunday, November 14, 2021

Imperial Navy Marauder Destroyers - Part III (Showcase)


Flying in very tight formation.

Skipping straight to the showcase of the Marauders, here they are. I was busy of late and had little time for posting any works in progress, but there's really not much different to how the Thunderbolts were handled. The canopy, trim, guns, all the same.

What is different with the Marauders comes down to the flying lights, exhaust soot, and varnishing.

The red and green lights are incredibly simple. Corax White, and then either Spiritstone Red (for the red of course), or Waystone Green (for the green funnily enough). And that's it. The gemstone paints really give a bright and glossy finish when applied over white, and it's a very little detail that really adds to these models.

Exhaust soot is much more apparent on these when compared to the Thunderbolts. More engines and some kind of vents on the upper wings couple with a greater wingspan to fill with something interesting just make it more natural to add black exhaust staining. This is again very simple: Abaddon Black drybrushed on. That's it. Obviously the brush cannot be overloaded, but it gives an excellent weathering effect that gives an appearance of an aircraft that's seen a good deal of use.

Next up is the varnishing. I attempted to use Vallejo Premium Airbrush Matt Varnish. It didn't give a matt finish. I possibly didn't shake the bottle properly, so I will attempt it again at some point, but using a brush managed to tone down the worst areas. At least there's no frosting.

About the missiles: painted exactly the same as the Thunderbolts, and I think better to have them than not. Makes it look a little more capable than a simple bomber. The missile heads are possibly too bright, but it provides a little bit of framing for the rest of the model and works ok.

In wrapping up I thought I'd jot down some thoughts on painting Aeronautica scale models in general. It's not something that fits my usual style of painting very well - details are simply too small to pay much attention to, and careful blending and edge highlighting is pointless. What really works well is the panel highlighting with the airbrush, recess shading to outline it all, and effects such as the exhaust soot. Some details really do help (such as the strobe lights). Drybrushing is sufficient for most of the model, or a simple base, wash, single highlight. I started to go beyond that in places and it was simply a waste of time - and I was beginning to lose motivation despite liking the look of them. It's the difference in scale that impacts things the most - it differs how light is expected to behave to the eye. The airbrush steps, and weathering, are the most important for aircraft. Titanicus is the same scale, but not familiar shapes and so they can be painted more like a Space Marine. Aeronautica Imperialis needs a slightly difference approach.

Let's see how I get on with the Thunderhawk.

-- silly painter.


Saturday, October 23, 2021

Imperial Navy Marauder Destroyers - Part II


If brute force doesn't work, you're not using enough.

A little more work on the Marauders, adding some trim base coats and recess shading. Lots and lots of recess shading. And it's still not yet done.

The camera has a different lens on it right now, so the photo isn't quite as I would like, and travel soon will mean I'm writing this up earlier than it deserves, but it's still nice to see a photo of progress.

Drakenhof Nightshade has been used to border pretty much every panel, shade every rivet, and outline various details. It's precise work, so I've been using a good brush to make it easier but then have to be sure to clean it regularly as I go around the models. And it's still not done: the trim needs shading yet with Coelia Greenshade, and then there's Nuln Oil to apply. I'm also considering a mix of Nuln Oil and Agrax Earthshade to create oil streaks.

In other words, there's an awful lot to do yet, but the most tedious parts are nearly out of the way. Edge highlights are far less demanding, and then detail work will really start to bring the model to life. Recess shading gives outline and definition, edge highlights give some extra contrast, and details create interest.

I'll admit that I'm liking this model a lot more than when I first started. It certainly has some character about it, and I'm looking forward to putting the two I'm painting on display next to the Thunderbolts.

-- silly painter.


Sunday, October 17, 2021

Imperial Navy Marauder Destroyers - Part I


Marauder "Lancaster" Destroyer

Hot on the heels of the finished Allarus Custodians, it's time for a bit of a change of pace by going back to Aeronautica Imperialis and finishing off the models I have for that - a couple of Marauder Destroyers. I wanted the motivational win of having done all models for a particular specialised games, and something not Space Marines (Project 20 is still ongoing in the background).

I'm also wanting to clear space for whenever the plastic Thunderhawks are released.

Fortunately the Thunderbolts provide an excellent reference for the colours to use, so there shouldn't be any particular difficulty in that department. Actually the most difficult part is going to be what should be metallic and what shouldn't.

So far not too much has been done:

  • The Fang base coat (a spray can was available for this purpose and saved a good deal of time).
  • Russ Grey to highlight panels with an airbrush.
  • Fenrisian Grey to highlight the underneath of the aircraft.
  • Death Shroud to make a few oil stains. I may have to increase this a little more later on down the line as it's not quite as visible as I'd like.

I've started to block in some metallic areas and already placed some decals as well, although they won't be sealed fully until a much later step. The silver colouring will likely take the longest of everything with these models, but I have to remember that the varnishing will dull them down somewhat.

These models also come with a peculiar problem: lack of components. There's enough space for eight missiles (four under each wing), yet none are included in the box. This seems to have been an oversight during design and production, but luckily I kept the spares from the Thunderbolts and there are just about enough to make up for it. Some missiles will be "against the rules", but look close enough that it shouldn't be an issue once glued in place with the rest. It's kind of annoying that not everything was included, but then I'm not too disappointed because fewer spare parts are now going to waste, so it balances out in the end.

-- silly painter.


Tuesday, October 12, 2021

Allarus Custodians - Part IV (Showcase)

Shoulder pads that are nigh Exterminatus-proof.

 Well I managed to get them finished a little bit quicker than I originally anticipated, if later then I wanted. They were both easier and more difficult to paint than I was thinking when I started, with the difficulty ultimately coming down to subtle decisions about precisely which colours to use where, and what scheme to go with. Ultimately I'm satisfied with the gold - it's different from how I paint Blood Angels, yet still golden armour and something that would hopefully transfer onto the rest of my Custodes (one day).

I'll begin with the base. Unusually for a photo, I decided to show how I was holding the models in place one I had glued them to the base - and yes, Blu-Tac, or whatever derivative/alternate name. During previous steps I had notice that the bases bent ever so slightly when clipped into the holder and was concerned that this might crack the superglue keeping everything in place. So I had to improvise. Not the best, but didn't have much further to go and so it was...alright.

I tried the now infamous "wet-wipe" approach to a marbling effect on the bases, first trying it out on some thick cardboard. Black undercoat, cover with a pulled wet-wipe, followed by Russ Grey and Wraithbone. At this point I'd decided it wouldn't work for me with the bases directly, but enough places on the cardboard seemed good enough that I could use it directly. I also didn't want single pieces, so cut it up into squares, superglued these onto the bases to form marble tiles, and then trimmed the edges to fit. I also thinned down some blacks on the wet palette to add some more distinct lines in places. Ultimately it's good enough, but in future I may well go back to just doing everything by hand. The wet-wipe approach does serve as a good reference to work from however, which is worth considering too.

Ropes are a muted white, and I decided this was good enough. I didn't want them too bright lest they start to look reflective:

  • Base of Celestra Grey over all the ropes.
  • Basilicanum Grey Contrast over that.
  • Using a thin brush, highlight the ropes again with Celestra Grey.
  • Ulthuan Grey applied with a fine tipped brush to complete the highlights.

Pteruges had an edge highlight of Doombull Brown mixed with Evil Sunz Scarlet and stippled / striped in key places. I never wrote down what was done before that unfortunately - some browns, highlighted with rust tones, before the final look. Not terribly impressed with how they all turned out so no great loss - I'll try again next time and come up with something else.

Leather straps are borrowed from a previous model:

Thondia Brown over the leather areas.

Gorthor Brown used for some highlighting.

Gorthor Brown / Celestra Grey (1:1) mixed and used for scratches and general wear and tear lines.

Thondia Brown / Abaddon Black (1:1) thinned heavily and added to recessed areas, just because I was too lazy to dig out the Agrax Earthshade for what would be the same effect.

The top knots were quite simple in the end:

  • Mephiston Red over the entire top knot.
  • Wild Rider Red to highlight some areas.
  • Carroburg Crimson to shade the entire area.
  • Wild Rider Red to highlight important areas more, if required.
  • Flesh Tearers Red Contrast applied to generally darker areas, and then feathered out from there.

These are impressive models, no two ways about it. They each have a lot of character about them, and the armour is festooned with detail. Quite glad I'm finally able to add them to the "finished" collection, but there remain many more of their brethren to paint up yet.

-- silly painter.


Sunday, October 3, 2021

Project 20 Marines - Part III

Watch your back...pack.

 This is going to be another very short post, and as fair warning it might be a little random. There will also very likely be no post next week, but after that I hope to have a few things picking up again.

Anyway, that out of the way: backpacks are fully airbrushed. These included a pre-edge highlight step to see how the final highlight of Evil Sunz Scarlett would turn out over the top. In the photo the edges are visible, barely, but do not clearly stand out. I'm pretty much ok with this, and will definitely try to reapply a thin edge highlight again in select places. Is this worth it in the long run? Well....maybe. It's going to take a lot longer, but I think it's actually worth it for me. I like some edges being subtly defined, and this will help. So I'll stick with it and see how it goes.

Next step will be to add some recess shading, then the metallics (at least as far as the pre-varnish stage).

On the subject of varnish, the local weather has not been particularly conducive to correct drying of Purity Seal lately and I looked around for an alternative. I wanted something where frosting would be less of a problem, and the only real option is the airbrush. I also use the varnish to help seal decals and make them look part of the model, so ideally a matt varnish as well. To that end: Vallejo Premium Colour Matt Varnish. I've given it a quick test on a couple of models and it's held up fairly well so far, but the real test will be the twenty marines in progress right now. I'll also need to be really sure to clean out the airbrush as soon as I'm done with the varnish.

Don't forget decal softener when working with decals. A bit of softener and a cotton bud helps to keep the decal moulded to the surface, which makes the varnish step work much nicer.

As a final random note for this post: I've finally found a use for old paint bottles. Remove the lids, cap with plastic bottle lids (ones with a flat top), and then use a cross pattern of tape to keep the lids secured, and there are little holders for models while airbrushing them. I normally use blu-tac (or equivalent) to hold a model in place for this, but having that holder just means my fingers aren't in the way while using the airbrush. These are no match for a Citadel painting handle (the original variant) but also don't need the model glued to a base, no pinning is required, and are really only intended for the airbrushing step. All built from materials that would otherwise go into the bin.

I have other models in the background being painted as well, but they're not far enough along to do another post on just yet, which is partially why I'll take a week break before showing something a bit more interesting.

-- silly painter.


Saturday, September 25, 2021

Lumineth Vanari Auralan Warden - Part III (Showcase)


Early toothpicks were dangerous to use.

A bit of a jump in steps, but the model was always about playing with, not replicating. Plus I wanted to just finish something to get motivation up, so this was it. I did not bother with being perfect, cut several corners (the eyes in particular could have a lot more work done, gemstones were done using technical paints only and without shading or anything), and generally consider it tabletop ready only. Really trying to save caring more for special characters. Or just Blood Angels in general.

The main idea behind this model was a more limited palette and seeing what differences I could show in texture. White on the cloth and armour panels, blues much the same. The "scales" were a mix of greys. I also tried a little NMM in places using an unusual combination:

  • Thondia Brown (actually the base brown used everywhere on the model).
  • Wild Rider Red on highlighted areas.
  • Yriel Yellow glazed over most of the "metal", and then built up more on brighter points.
  • Yriel Yellow mixed with some white on the palette for spot highlights.

I kind of like how that gold came out in the end. The brown base works here, giving it a neutral gold rather than shifting to any cold or warm spectrum in particular.

Tassels were a simple combination of Wild Rider Red shaded with Carroburg Crimson. Such small details don't need more, but I wonder if that would provide a good foundation for the top knots on the Allarus Custodes. It's worth thinking about.

And of course the varnish spray frosted slightly and really messed up a few areas, so in future I'll really have to look at a varnish that can be fed through an airbrush.

-- silly painter.


Sunday, September 19, 2021

Project 20 Marines - Part II


Colour-of-Dried-Blood Angel

It's been slow going with painting projects lately, just until I get a few things sorted out and free up some time and motivation. This post is nothing particularly special, and mostly just to ensure a few notes are kept about the Primaris assembly.

All of the planned twenty marines are now sufficiently assembled to start painting. It took some time to figure out the best approach the for Primaris models: the weapons are not separate from the arms. In the end I decided it best to assemble the arms fully onto the weapons, then allowing the shoulder pads to be glued into position, but keeping the arms only blu-tac'd in place for now. This allows the arms to remain in position for the airbrush stages, also keeping the shoulder pads with the same highlight direction, but easily removed later for easy access to chestplate and weapon painting.

I've yet to decide if various airbrushing stages should be done without and with the arms, or if various areas can be touched up with some Mephiston Red glazing later on.

As a further step from painting the backpacks, I'm experimenting with doing edge highlighting before the final airbrush highlight. I generally don't do much hard edge highlighting anymore and it's hoped that this will allow a softer but still defined edge highlight that I can then strengthen in areas as needed. I've done a single test model in this manner and it's worked well enough so far. The rest of the backpacks need doing yet, but a wet palette means I can just do one at a time whenever the motivation strikes.

For something completely different, getting something to hold each model has been another challenge. I don't particularly want tens of painting handles, but would like something to hold the models while airbrushed. To that end: plastic bottle caps glued onto old Citadel paint pots. It's not perfect, but does the trick. Once the airbrushing is done I can then glue each model onto its proper base and use the painting handles from there.

-- silly painter.


Saturday, September 11, 2021

Allarus Custodians - Part III


The Caped Custodian.

After a little bit of a getaway, I'm back and picking up the brushes again. So while not a whole lot of progress has been done since last time, there are enough little pieces to note down what has been done.

To start with, the armour has been highlighted on this model. It doesn't really look that way in the photo, and indeed it's subtle, but sometimes subtle stands out more. I toyed with a few things but ended up with:

  • Canoptek Alloy / Liberator Gold (1:1) mix for an initial highlight, mostly along "feathers" of the various eagle designs, and edges. Liberator Gold alone has the wrong hue and doesn't match the gold armour, so here it's mostly used to saturate the Canoptek Alloy slightly.
  • Canoptek Alloy for edge highlights, or anything that should stand out in particular.

For what I take to be either shield generators, or some kind of power reactor on the back:

  • Warplock Bronze base coat.
  • Castellax Bronze to highlight, with a fair amount of mixing with the previous colour to get the transitions just right.
  • Canoptek Alloy for edges.

Obviously I'm enjoying Canoptek Alloy quite a bit here. It's a remarkably versatile paint and can be used for bright edges where a silver simply doesn't fit.

Gemstones I have to guess at. I wrote it down at the time, but have since lost the piece of paper. So this is a guess but should be close:

  • Night Lords Blue across the gemstone.
  • Sotek Green across about half the gemstone.
  • Ahriman Blue as a sort of edge highlight.
  • Abaddon Black, or Nuln Oil to darken the opposite side. This step isn't always necessary, especially for smaller gemstones.
  • Corax White for a reflection dot.
  • 'Ardcoat gloss varnish at the end.

The blues tending more towards aqua are a bit of a running theme for these models: I used Talassar Blue, Aethermatic Blue, a little Baharroth Blue, and some Guilliman Blue (the old glaze paint) for the power field effect on the weapon. I tend to give it more colour towards edges and points, and use stripe motions or drybrushing for a weapon in motion. The model shown here is not swinging his weapon, so it's a smoother appearance.

And the cape. I played around on another model to try get a feel for how to paint soft material, and initially tried stippling, dabbing with a drybrush, and glazing, but in the end most of that was simply wasted. Cloth does not highlight with smooth transitions like hard surfaces, so drybrushing works really well. It also doesn't desaturate from reflectivity, so the choice of highlight colour really matters too. In the end I'm going with:

  • Dryad Bark / Mephiston Red (1:1) through the airbrush, all over the cape. Most of this is going to show through, so two coats to give an even finish might be needed.
  • Word Bearer's Red, drybrushed very gradually and slowly built up in desired areas. Really take some time with this step: rushing will ruin it. Dabbing motions can also be used if the paint isn't quite so dry.
  • Mix a very slight amount of Ulthuan Grey with Word Bearer's Red (and not much at all is needed - if in doubt, use less Grey) and drubrush this onto more prominent folds.
  • Agrax Earthshade stippled, dabbed, and glazed into deeper recesses.
  • Druchii Violet stippled, dabbed, and glazed across mid-tone areas to give some variation.

The capes will be matt varnished before being glued into place. In the photo above it's simply staying there, but isn't yet glued. The varnish step will help to differentiate the texture from metallic gloss that much more.

I'm not sure yet quite how to paint the top-knot. Red as a primary colour seems like it might be suitable, but too bright or saturated and it will take attention away from the rest of the model. There are still small details like the vents on the back that need finishing, the weapons, and various other items of interest. The base I will do as white marble.

In other words, still a lot to go on these models - at least two more blog posts, perhaps even three, but there is progress.

-- silly painter.


Thursday, August 26, 2021

Project 20 Marines - Part I


Mr Grey

This post is a little bit different and is the start of a log of an attempt at assembly line painting. I'm horribly slow at painting models, but do finally have a solid formula for painting Blood Angels. This helps speed along individual models because I have plenty of references to fall back on when knowing what to do next.

The problem is the backlog of models that need painting. There are a lot. It's enough to keep me painting for a long time, and from a collecting perspective I have some models that are not really available anymore, so I am ok with having collected them. But I still want to do something about the backlog.

Blood Angels, perhaps more than any other army, have models that are all just about unique. Every marine looks quite different, with the multiple combinations options available. Within that, however, there are some similarities I can deal with: rope will all be the same, cloth, icons, blood vials, shoulder pad trim, etc. I don't need to batch paint every detail of every model at the same time, but I can do groups. With a wet palette, I don't even need to sit for long sessions - just a little bit each day will suffice. I'm also improving a lot with the airbrush - painting the basic coat and highlights of red armour isn't such a problem anymore.

Another demotivational point however, is sub-assemblies. I far more enjoy painting fully assembled models, and dislike doing them in parts with assembly only possible at the end. There's no way around that sometimes, so this experiment is as much about figuring out the most I can assemble a model as much as anything else.

And the experiment is: a production line of twenty tactical marines, mixing ten older models with ten Primaris. For me, that's quite a lot, and it will take time - but I'm hoping less than an average of one week per model!

To start with, the above photo is what I think I can get away with for basic assembly. The arms are posed, which was a bit fiddly to work with, but generally gluing the right arm first, then holding the gun in place while gluing and positioning the left arm seems to work best. The glue will take a moment to properly cure, but holds the position and allows for some adjustment so that I can be certain it will be ok when the gun is attached later.

The backpacks are being done entirely separate. Actually they're already a couple of airbrush coats in, and won't be long before they're onto the next steps. Backpacks generally don't get the focus of attention, so they're good to use as a bit of testing.

The bases are all done as well, just because it was easy enough to do. Once the airbrushing is done I can probably start to glue models to bases.

Back to the main model, leaving the guns off allows for easy painting of the chest, not to mention both sides of the gun. I'm sure some areas will be a pain still, but at this point the enticement of knocking 20 models off the backlog is too great.

PVA glue will be used on any area that should be glued later on. This generally means the attachment point for the right hand, backpack, and helmet or head. Using a dot of PVA glue before priming, it can be peeled off later to allow plastic glue to properly bond the surfaces.

Several Primaris still remain to be assembled, and they are a different challenge to the older models. The new designs don't allow the weapons to be so easily separated from the arms, so I'm undecided on if that means using a blade to force it, or to leave the arms off until the main body is painted. This is all exploration and experimentation, and I'm hoping the experience will make the next round of model assembly much quicker, allowing me to start making inroads into my backlog.

-- silly painter.


Lumineth Vanari Auralan Warden - Part II


Likes to sing the Blues.

Continuing with the theme of using free models for experimentation, the folds in the clothing worn by this model seemed an ideal place to try make clothing look like clothing rather than plastic. In other words, attempts at painting texture onto the surface. I took this a little further as well, and have used the same basic colours to try make a difference in texture for material, metal, and feathers.

White is planned, but this post will focus on the blue areas.

Firstly, the battle garment / cloak / dress. One of the difficulties in painting these is how to highlight and show folds without making it too smooth. There are a couple of observations that may help here:

Clothing generally doesn't give sharp, bright reflection points. Polished leather might, but even that will have less shine than gleaming metal.

The surface of clothing isn't uniformly smooth. Miniature painting generally needs to exaggerate stitching, fur, holes, etc, to make it visible at that scale, but the point remains that contrast exists even in lighter areas.

Stippling and drybrushing are the immediately choices that come to mind to paint clothing. The former was done here just for the experience. I've tried drybrushing before and while it did work to a degree, I basically wanted to see what I could do with stippling.

  • Kantor Blue was used as a first step, giving the battle dress and even coat to work from.
  • Shyish Purple (Contrast) was then thinned a little and applied over the entire dress. This was intended to give a little more shape and depth, but a normal wash would have sufficed, or even better stippling in a dark purple. Something to remember for next time.
  • Teclis Blue was then striped and stippled across raised areas. This was done in multiple thin layer passes, building up a stronger colour on more prominent patches. Takes some time, and was looking a little out of place, but I should have continued.
  • Kantor Blue glazed back over areas to bring them together more. This worked, but also muted the contrast severely. A different midtone should have been used, or the prior step given a lot more brightness.
  • Lamenter's Yellow glazed onto larger areas just to try bring the ambient level out a bit more. Yellow might seem an odd choice, and it does subtly shift the colour, but that also brings back some contrast and sells the effect a little more.

The last step is worth reiterating: subtle colour shifting and help make cloth look far more interesting, just through the use of colour contrast. I should have remembered that from long ago painting the Cold One cavalry.

The feathers are simple so far:

  • Kantor Blue base coat.
  • Teclis Blue towards the outer edges.
  • Drakenhof Nightshade over the whole area.
  • Nuln Oil in the shadowed areas, and towards the base.

In hindsight, maybe some Druchii Violet would have been a more interesting shade than Drakenhof, and I may yet add that.

Blue shiny armour I've tried a little bit of NMM technique with. I'm not very good at that yet, but that's why practice is good.

  • Kantor Blue base coat.
  • Teclis Blue in selected areas to start showing reflection.
  • Celestra Grey (being what I had on the palette from painting the whiter areas) for more extreme reflection points.
  • Black from the palette to darken other areas and boost the contrast a little more.
  • Glazing back and forth with all off the above to get it showing how I wanted.

Different end results with the same basics of Kantor Blue and Teclis Blue. Limiting to these has really helped think about how I'm going to give texture to the surface, and it's worth looking into limiting the palette further one day to push that even further.

I will probably end up using metallics for some areas, but haven't really decided yet. Going all NMM means more practice with that, but it just depends how motivated I am.

-- silly painter.


Friday, August 20, 2021

Allarus Custodians - Part II


This guy means business.

Progress on the Allarus Custodians, with some assembly having taken place. The above photo has the cape and left arm only temporarily held in place just for giving an impression of how the model is turning out, but all other components are glued in.

On the subject of glue, I used superglue for the head. This was a mistake. I should have masked out the attachment point and used plastic cement instead, because superglue can cause frosting in surrounding areas. I don't see it much, and it's probably something to do with the particular metallics used, but it gave the face a hefty amount of white stubble that I had to correct. More on the painting the face in a moment.

The armour was finished mostly as I intended before.

  • Thallax Gold / Air Caste Thinner (1:1 ratio) applied through the airbrush. Even thinned, Thallax Gold is quite an intense colour, so I tried to be a little careful about how I applied it.
  • Reikland Fleshshade (Gloss) added to recessed areas, and glazed into darker or shadowed areas. The gloss shades can be used as a glaze on metallic paints - they're thinner than normal shades, and are quite well suited to the surface created by metallics.
  • Cryptek Armourshade (Gloss) added to deeper recessed, or used to outline details. I considered using Nuln Oil, but instead went for something quite dark without being black just to keep a slightly warmer tone overall.

One of the bonuses from the gloss shades is that they act similar to a varnish. The Thallax Gold was rubbing off rather easily when handling the model, but with the shades applied that seems to have fixed the problem. I was experimenting with varnishes on minor areas, using Stormshield in thin coats to see how much it would dull the look. That's an acceptable, if time consuming, alternative, but no need if the shades protect it enough.

The armour is not yet finished. I intend to keep painting enough until full assembly, and then do edge and spot highlights. It might take a little while before I get to that stage: the cloaks I'm not sure of and will have to experiment on a test model first.

The face I decided to do in a darker skin tone. There's no particular reason other than I haven't done that before and saw no reason not to try, but I'm very pleased with how it turned out and how much character the face now has. Never having done dark skin tones before, I used mostly what was on the palette:

  • Eyes first, with Corax White and Abaddon Black. I find it much easier to paint the eyes before the skin tones, rather than trying to no get white outside the the lines later on.
  • Rhinox Hide applied across all the face (except the eyes of course!).
  • Barak-Nar Burgundy mixed with a little Rhinox Hide, added to the areas I wanted shaded. A little back and forth with the mixing here, just to blend it in, or pull it back if it was a little too purple for my liking.
  • Mephiston Red mixed with Rhinox Hide, added along the lips. Using Mephiston Red is difficult - it's a very pure red - so some other colour in future might be a little easier to get the right tone with.
  • Rhinox Hide mixed with Abaddon Black (being the black on the palette) and glazed over the top to give the impression of a shaved head. This took a little bit to get the tone just right, but I think it worked out well enough.
  • Cadian Fleshtone mixed with Rhinox Hide and used to highlight the nose, cheeks, ears, chin, upper lip, temples, and brows. Glaze consistency and multiple coats worked best rather than trying to go bright all in one go. I could push the contrast a little more, but with decent lighting it's enough that I don't want to mess with it more.

I may have glued the head with a little too much turn to it, but I he is looking where he's pointing (or starting to point) so it's not so bad.

As a final little hidden tip: the cowling was glued in place with PVA glue before the head was done. This allowed priming and airbrushing to be done on it, and for it to be easily popped off and glued properly once the head was then more easily put in place.

 -- silly painter.


Sunday, August 15, 2021

Allarus Custodians - Part I


Shiny armour to blind the enemy with.

Having multiple projects on the go at once will probably mean it will take some time to get any particular one finished, but it's also an opportunity to play with a lot of different colours. Also, the Allarus Custodians look really nice.

I decided to go for a golden armour, and generally stick to the reference colours, but with my own approach on getting there. Knowing I want golden armour gives me a chance to try out various airbrush paints, but it took a little thought on what I would try; I didn't want to simply repeat the formula I used on various Blood Angels, instead looking for a way to make an older looking armour, something of a burnished, earthen gold.

First step is, as usual, a black primer. Following that, although there's still at least one more airbrush step to go:

  • Balthasar Gold (Air). This is an excellent starting colour, and a bit of care was taken to get good coverage. As a darker brown tone it serves well to keep it in the recessed areas.
  • Valdor Gold (Air). An interesting colour. It's almost like a very heavily de-saturated version of the previous step. I'm still considering if it might be useful as a final highlight later - it's quite a thin paint naturally, and doesn't give the coverage over black, but is a little too de-saturated to use as a midtone. I intended it to serve as a lighter colour for helping highlight a later step (not yet done).
  • Agrax Earthshade. Using an airbrush here because I wanted to put some colour back into shaded areas. This ends up almost a beaten brass in appearance, which is something to remember for future reference. It's this step that makes the photo above look a little strange with the highlighting, but a later step is intended to correct that.
  • Nuln Oil (Gloss). By adding some black to deeper recessed areas, or used more for outlining, I'm hoping the later step won't entirely obscure those areas and keep definition and depth. Although I generally don't like gloss in recesses, in this case the paint simply flowed much easier without staining raised surfaces. Some areas may need to outlined again later anyway.

The missing step is a coat of Thallax Gold. This will shift the colour back into more yellow gold, for which reason I intend to thin it slightly before applying through the airbrush.

Paintbrush highlights are almost certainly going to be done with Liberator Gold, and maybe a few edge highlights with Stormhost Silver.

These are really fun models.

-- silly painter.


Saturday, August 14, 2021

Lumineth Vanari Auralan Warden - Part I


Pointy ears, pointy shields.

One of the great things about free models of the month from Games Workshop is that they can serve as an experiment platform without needing to care if the results really work or not. Trying different techniques, different colours, is always motivational, but when you're looking to create a colour across an entire army then whatever is done first tends to stick just to keep everything cohesive. So this Lumineth model is going to serve as experimentation, mostly for Custodes as it turns out.

There will probably be quite a few small posts for this model as I want to track how each part is done, if I like it enough to warrant being on the Custodes.

The shield as it turns out has a nice pattern on the back that is perfect for playing with colours that might suit the leather gauntlets and weapon grips that many Custodes tend to have. The robes will also be a good fit for practicing cloth-like appearance, but that's for another post.

The leather patterning shown is:

  • Mournfang Brown as a base coat.
  • Doombull Brown applied on all raised areas, leaving the deepest grooves alone.
  • Mephiston Red glazed onto central edged areas.
  • Word Bearer's Red added to  highlight about mid-way along each interlocking piece.
  • Mephiston Red glazed again as edge highlighting. I liked how it turned out, so keeping this in two steps will remain - it helps to shift the tone of the previous colour slightly.
  • Barak-Nar Burgundy thinned down and added to deeper recessed areas, and glazed into the outer areas of each piece. As a base paint this can be tricky to work with, so it needs to be thinned quite a bit.

The last step can really help to shift from a red into a more purple appearance, and I suspect I'll use that for a bit of contrast on the Custodes. It gives that much extra depth. I might consider a wash of Carroburg Crimson as well, but that might be better suited to something with a little more sculpted texture, like the weapon grips.

The metallics seen on the shield were the result of some playing around with airbrush paints with a normal airbrush, to figure out how the armour on Custodes might be done. More on that soon.

-- silly painter.


Sunday, August 8, 2021

Flesh Tearer Reiver - Part III (Showcase)


Walking on black...stone.

Done enough on the Reiver for now. The model isn't fully complete, but it was always intended only as an airbrush test to begin with. Just wanted to see how much edge highlighting would show on through. The rest was just playing around for the sake of it.

The helmet eye lenses are done as a glow effect. No white dots to get in the way. I still have Waywatcher Green from the old glaze paints, and used that to put some glow around the "eye sockets", with white and Hexwraith Flame for the lenses themselves. A bit of thinned black around the edges helps with more depth, and while purely by chance of being inspired to try it, I really like that subtle addition.

The NMM on the blade came together ok. It looks far better in the photo than in real life. Need a lot more practice with this technique, as it's something I do want to learn - not for normal models, but if I ever do a diorama where light sources are important, then I want reflections and shine to be based of the light sources in the scene. So I'll keep at it with test models I think.

I could not be bothered with the base. Absolutely nothing was inspiring to me, so in the end I just left it a clean black.

The spray varnish really took away any shine, and there was a little frosting from the humidity in the air. I'm tempted to used a paintbrush and put some Stormshield back over some areas, but I'm unlikely to go that far. At least that varnish really merges the decals onto the model.

-- silly painter.


Tuesday, August 3, 2021

Flesh Tearer Reiver - Part II


Stabby McStabsalot

Still slow going for now, though the pace should pick up again in another week or two. I've managed a little bit more on the Reiver, and have decided that as a test model I'll give NMM another go. I'll mostly focus on the knife for the effect, but the gun will have a little bit added as well.

Although starting to take shape, I can definitely say that sub-assemblies, even just for initial base coat and highlights, are the way to go with an airbrush. I have some plans around that in a couple weeks.

The pouches here are done with a new paint: Thondia Brown. It probably wouldn't be far off from a layer paint really, but gives a nice basic leather colour to work from. I glazed a little Bloodletter over the top, mixed some flesh tones on the wet palette for edge highlights, and added some Agrax Earthshade at the end for a bit more depth. It needs something else perhaps, but that's for experimentation some other time.

On this model I also tried out Vallejo Decal Softener. I wanted to see how much better it might be at moulding decals to the underlying surface. It does a pretty good job actually, even on the circle applied to the left pauldron. The latter was purposefully unprepared (no strategic cuts to help it fold over) and while I had to work at it with a brush, it came out surprisingly well. I fully intend to keep using it in future.

It'll still be a while before I finish this model - probably another week and a half, if I'm lucky.

-- silly painter.


Sunday, July 25, 2021

Flesh Tearer Reiver - Part I


Seen my knife? Let me give you a closer look.

Playing around with a freebie model makes for good experimentation, so I decided to see how well airbrushing in different stages would be on a Reiver. Normally I'll base, shade, and highlight with an airbrush before then going in with a normal brush. This time, I wondered how well pre-edge highlights would show through.

The basic idea is to base the model with an airbrush first, then edge highlight with a normal brush, then perform a normal highlight with the airbrush. I find the edge highlights can be a bit strong sometimes, and wanted to soften them slightly. I don't have to worry as much about transitions, and cleaning up a base coat is easier when there aren't carefully blended gradients to be concerned with.

First step was Khorne Red. Flesh Tearers colours are more towards the blue end of a red spectrum, which this base colour provides.

Cadian Fleshtone provides edge highlights next. The stronger the highlight, the more will show through after the next step. This is rather similar to how the Contrast range is used.

Wazdakka Red was then mixed with some Aircaste Thinner to highlight with. I thinned it a little too much however, and ultimately had to use a brush later to add more to a few areas. Something to keep in mind when mixing layer paints for use in an airbrush.

Did it work? To a degree, yes. It's a little more muted in places than I would have liked, but shows through well enough in others for me to be convinced of the usefulness in further exploration. I may try this on my normal Blood Angels formula as well, but that will have to work differently. Wild Rider Red will almost certainly be as muted, if not more. I could use that to advantage: there's no reason I can't apply a second edge highlight later to bring out selected edges, leaving others to be defined without the Tron appearance.

-- silly painter.


Friday, July 16, 2021

Imperial Thunderbolt - Part V (Showcase)


Not the flying circus.

Thunderbolts were finished some days ago, but I've not had a chance to post about them yet owing to various problems. In fact, I don't really remember everything I did since the last post, so I guess this is something very quick.

The metallics I started in typical fashion, but ended up switching to drybrushing for the highlights. This gave a much grittier look to them, which fit perfectly with the overall style for these planes. Fairly plain, very little highlighting, really just letting the airbrush steps show on through to give a more practical feel. Very little fancy painting at all, which strangely was difficult to do - I wanted to go to far with them, but every time I tried it just didn't look right. I hope I've still captured the workhorse nature of the planes in what's there.

Another thing I didn't do: weathering. There are little touches here and there: some darkened areas near the engine exhaust, a few very small drybrushed wear & tear around the canopy where I imagined the pilots would be getting in and out of. No wing scratches, no scorch marks, etc. It might look alright with such weathering, but on inspection of various photos of planes, not much of that is visible at full scale, let alone on a small model. Flex from the wings of Spitfires showed common wear to the paint, but that doesn't fit these models. So I ended up not weathering them - if I tried, I'd very likely ruin the look. Perhaps I can practice on some tanks at some point, where weathering definitely fits more.

Not seen there is some yellows thinned down with water and washed into areas to simulate jet propulsion glow. A little Fuegan Orange afterwards to shift the colour a little as well. 

That's really it. I may consider completing my Aeronautica models soon by doing a couple of Marauders, but first I'll likely get back to 40k.

On that note, there could be 3 or 4 weeks of "not much" now. I have some other priorities to attend to, after which I'll have much more time for painting and will hopefully start to get a lot more done, with more interesting posts.

-- silly painter.


Tuesday, July 6, 2021

Imperial Thunderbolt - Part IV


The pilot is seeing red.

These models are taking ages to paint. This is purely because of lack of time: work, a cold, a few other things getting in the way. So this is yet another short post, but an update anyway to show that even with short time, progress, however slow, is being made.

The canopy was was a little bit of fun. I tried to make it seem brighter towards the front, but didn't want reflective dots like with eye lenses in helmets. Just didn't seem like it would fit: such a bright reflection point would be lost in the size of a canopy, and instead be generally a more bright area. Perhaps didn't push the brightness far enough, but the darker tone suits the workhorse nature of the Thunderbolts anyway.

  • Gal Vorbak Red over the canopy.
  • Wazdakka Red layered and blended to the front. At the very front I also added some cream tone to the mix, making it very bright to the front. This is pulled back later.
  • Abaddon Black thinned towards the rear of the canopy.
  • Blood Angels Red (Contrast) glazed over the canopy to tie everything together and give a more saturated red.

The frame of the canopy was the usual Eshin Grey, Dawnstone, and whichever black on the palette - basically the same as I do for black armour on Space Marines.

A little Fenrisian Grey for a few edge highlights on top, and as the basic missile colour underneath. I tried not to overdo it, and in fact it probably didn't need any edge highlighting at all. I stopped short of going around panels - it just doesn't fit the feel of the model to do that.

Thunderhawk Blue for trim highlights, with Coelia Greenshade in recesses rounds off the highlighting. 

Getting very close to the metallics stage now, and weathering, but still a few smaller details I'd like to take care of. One example is the missile colourings: after a little research, it seems that yellow stripes around the head indicate high explosives (the warhead), with brown for low explosives (the rocket). Black for the fins, because why not.

Pretty much want to rush though and finish these models, but likely won't have them done by my intended target date. So it'll be another slightly late post again, hopefully with them finished by that time.

-- silly painter.


Sunday, June 27, 2021

Imperial Thunderbolt - Part III


Now with wings on the wings.
 

Painting these fighters is proving to be painfully slow. No real reason other than lack of time, but perhaps there is an element of them being something so different that I'm having trouble getting into the feel of it. I am still painting all four simultaneously, which will naturally take longer, but even so they should really be much further along.

I used some busy time to think which transfers to apply. Obviously the leader has wings on the wings, and with a black tail there will need to be a white transfer. I've glazed a little Russ Grey over the white transfer as well, but it needs some more. The other planes have a number on each wing, and the black variant on the tail. On the note of transfers, I used airbrush cleaner to help soften and match the transfers to the surface, but it appears to have reacted slightly with the prior varnish step and smudged some paint. It's visible on the left wing, so I might have to add some scratches there to cover it up slightly. A good point to remember however: only varnish after transfers, never before.

I've outlined all the panels and shaded all the rivets on the blue-grey areas. That took some time. I ended up batch painting areas, e.g all tops of the wings, then all tops of tails, then all sides, then stages along the undercarriage. This helped quite a lot - batch painting doesn't mean only one colour at a time, but it can equally apply to one area instead.

There is still some of the time shading to be done, then trim highlighting, metallics, the canopy, weapons, and weathering. Still a lot to go. Somehow it feels like I've turned a corner though, as if the hard part is now over, and so I'm hoping the rest will go much more quickly. Still, with the little time each week I have right now, it will probably take another couple of weeks to get these models done.

I've been using the new STC paintbrushes from Games Workshop on these models too. I haven't used enough to get a full feel of them, but they are so far handling better than the last ones. They still form a hook on the end, which just seems to be a part of using synthetic brushes - but at least harming animals isn't required. Definitely superior to before, but don't come close to sable brushes. I may write more about them after finishing the Thunderbolts.

-- silly painter.


Tuesday, June 22, 2021

Imperial Thunderbolt - Part II


Colours of war.

A little late with this post thanks to being constantly busy with work and other tasks, and for the same reason not really that much done for the past week and a bit. I did try to come up with the basic colours for the Thunderbolts however, and have managed to block in some base paints to give an idea on one of them.

Stegadon Scale Green for the trim, Corvus Black on the tail and cockpit, and in this case some Gal Vorbak Red for the canopy. No silver applied yet to the engines or other areas, only some black because it was on the palette and I figured it would give a visual clue to the final result. The red cockpit is intended to be as hints from red cockpit lights; traditionally red was used to not ruin the night vision of pilots when looking out the window, so I'm going with that. Plus it fits the paint scheme: the Knights have red "eyes" (visual sensors or some such) and so it's fitting that the planes have a red tinted cockpit canopy. A little visual difference on the lascannons to line up targets, and to add some interest. There's not much else that fits brass colouring, but sometimes less is more.

I also used GIMP and an outline of the Thunderbolt to plan the colours, which helped decide where and what to make black. Games Workshop should release outlines for more models to allow people to more easily come up with colour schemes.

This particular model will have a black tail, though I may not do that for the others. This is the lead plane and so will have some distinguishing features.

Overall I'm happy enough with the colours and so will continue this with the other three models and then get started on some highlighting.

-- silly painter.


Monday, June 14, 2021

Imperial Thunderbolt - Part I


To the skies!
 

A very quick post today because not much time the past week. The next models up are a set of Imperial Thunderbolts from Aeronautica Imperialis. One, show here, is a Thunderbolt Fury and is the designated squadron leader. They have an assortment of loadouts, but are predominantly anti-air; I have a couple of Marauders as well which I intend to be bombers or anti-ground loadouts.

The colour scheme follows that of the Knights for Titanicus. Pretty simple airbrushing (over a black primer) only so far:

  • The Fang over the entire plane.
  • Russ Grey to highlight the centre of various panels.
  • Fenrisian Grey / Air Caste Thinner (1:1) lightly sprayed underneath. This isn't seen in the photo, but is a nod to many aircraft doing this to help camouflage against the sky.
  • Deathshroud around exhaust areas, gun barrels, engine areas, to give an impression of soot and oil.

The Imperium likely wouldn't care much for camouflage paint schemes for their aircraft. The fighting environments are too varied, and the resources applied to engagements by the Imperial Navy aren't expected to be subtle. Likewise, their fighter planes aren't going to be in pristine condition - especially the Thunderbolts. They're used for combat, not parades. The highlighting and blackening approaches help give a less uniform appearance, more of a rough and ready look without even applying scratches or battle damage. I will probably do a little more such things later as well, just to really separate the look of these models out from my usual style.

Not sure the attempt to lighten the underside worked. I tried to thin the paint somewhat and make it more glaze-like, hoping to keep some of the prior highlighting showing through. It's still good to experiment sometimes however, so I'm glad I gave it a go.

-- silly painter.


Monday, June 7, 2021

Horus Lupercal - Part XI (Showcase)


Warmaster Horus

I'm calling him done. I could do more. I could always do more. I could put more marbling on the eagle. I could put more colour into the rubble. There has to be a point though where I say the model is done, and I think I'm there.

This model has been quite a journey. I started it in January 2017. Four and a half years of painting a single model. Not constant of course, many breaks between steps, but it's still quite a long time. Most of it was only done in the last year or so, quite possibly thanks to a year off work, but also finally knowing just how everything was going to be done. I also had to wait until I deemed myself good enough give the amazing sculpt justice.

There are a couple of notes on painting items on the base. The pauldrons littering the base are black with brass trimming. I figured this was fairly Legion agnostic, and so could represent any force that Horus was facing, or even the troops belonging to his own. The trim itself is:

  • Balthasar Gold as a base.
  • Castellax Bronze painted directly into recessed areas.
  • Brass Scorpion added as highlight points.
  • Agrax Earthshade added to selected recessed areas, mostly to outline rivets, but also to dull the shine.
  • Stormshield to varnish and reduce shine a little more. Being in rubble, I didn't want any metallics to be overly bright.

Another piece of the base puzzle that I'm fond of is the iron girders. I mostly certainly didn't want them as a bright silver. Such building materials are generally worn, covered in concrete, slightly oxidised, and dull. I thought about it somewhat, did a test piece, and ended up with:

  • Dryad Bark over all the metal.
  • Iron Hands Steel thinned with water, and slightly dabbed and drybrushed over most of the metal. Recessed areas were mostly left alone.
  • Fuegan Orange painted into selected recessed areas, a glazed onto flat areas randomly. Don't overdo this step, less is definitely more, but a hint of orange rust is the idea.
  • Ironbreaker highlighted onto very select areas, typically where the metal has broken away. These pieces wouldn't be oxidised so much, not covered in building material, and so are given a cleaner look.
  • Stormshield varnish applied over all the metal area to dull it down.

I also played with various colours around the base in a mostly random manner.  Rubble was highlighted around any metal, skulls (contrast method, a little Druchii Violet for shadow colour, Screaming Skull for highlights), armour pieces, just to blend it all together. I stuck to the colours used on the balustrade, steps, and eagle statue. These were the likely source of most of the rubble anyway, so it makes sense to keep to that palette.

Somewhere along the way, I looked and thought "done". I need to play with the lighting more, do a little photo adjustments for the fun of it, and also magnetise the base. With a lot of magnets. In the meantime, enjoy Horus Lupercal, Archtraitor Primarch of the Sons of Horus.

Horus Lupercal. Warmaster. Traitor. Heretic.

 -- silly painter.